

As regular readers are aware, I enjoy spending time logged in to a few personal favorites of the myriad telnet bulletin board systems that are presently online and serving as discussion communities for their users. As often as I can, I use one of my vintage systems to “dial” in and read the latest gossip rather than a modern Mac or PC. I use serial-to-WiFi bridge devices to make the process simple and as clutter-free as possible.
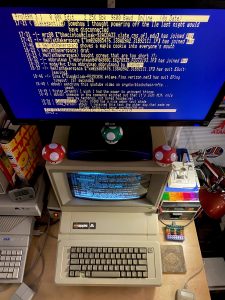
Another “modern day” (if you can call it that) use of these vintage systems I like to engage in is keeping an Internet Relay Chat (IRC) instance open on this or that system to glance at across the room and occasionally wheel my chair over and chat a bit on said system. (I hope you didn’t learn about IRC on TV…) This pursuit is less well served by the aforementioned serial-to-WiFi bridges given that many of the systems on my desks lack a proper IRC client. If I want to use such systems to IRC, the best way to go, from my perspective, is to telnet into my always-on desktop Mac and launch my go-to IRC client, the terminal-based irssi, which works quite well as accessed from a remote VT100 terminal. And, nearly all of the systems in question have VT100 emulation supported by a several software terminal emulator programs such as ProTerm on my favorite vintage IRC system, the Apple IIe to my left.
For years (and on many different systems) I would achieve this by utilizing a USB-to-serial adapter on the Mac and running a serial cable from the vintage system in question to said adapter on the Mac. But it was a cumbersome process. And, several OS updates ago Apple redid the USB stack in macOS and rendered the adapters I had on-hand inoperable. To get around this I setup a Raspberry Pi connected via WiFi to my network, specifically to serve as the host system for the remote terminal, as it maintained support for my adapters — it worked (video), but it was a configuration I was never really happy with.
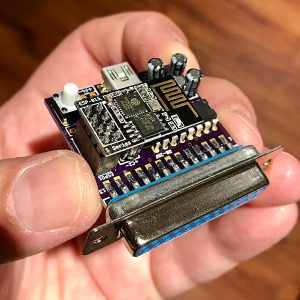
So, I headed to the Apple II Infinitum Slack channel and asked if it was possible to setup a listener on the desktop Mac to allow a vintage system equipped with a serial-to-WiFi adapter to “dial in” to the Mac and be granted a wireless terminal connection. It turned out, it was.
I learned that in a few simple steps you can setup a listener macOS daemon that will allow an incoming telnet connection to a specified port and present a shell session with a login prompt where you can login and execute terminal commands. When I do so, I’m usually there to launch irssi and connect to an IRC server, but other commands work nicely, such as the system monitor top, if you want to keep an eye on how things are doing when fullscreen apps are hogging the displays. (Another nice terminal-based IRC client is WeeChat, by the way.)
I currently have this arrangement up and running on my 2022 Mac Studio (M1 Max) but I originally set this up on the 2017 5K iMac (Intel Core i5) — it will work on either Apple Silicon or Intel-based systems. Here’s how to do it.
If your Mac doesn’t have a static IP on your LAN, it’s a good idea to configure your router to assign it one so that you’ll know what IP to “dial” up. I’ve configured my router to assign the Mac Studio the static IP address 192.168.1.150 on my LAN.
Now it’s time to install the required relay / bridge utility, socat. There are several ways to achieve this. If you use Homebrew, as I do, then you can simply issue the following in the terminal:
brew install socat
Next, the listener is a .plist that needs to be loaded as a daemon. The file I am using, com.retrogeeks.bbs.plist, was shared with me on the aforementioned Slack channel. Here it is in its entirety:
<?xml version="1.0" encoding="UTF-8"?>
<!DOCTYPE plist PUBLIC "-//Apple//DTD PLIST 1.0//EN" "http://www.apple.com/DTDs/PropertyList-1.0.dtd">
<plist version="1.0">
<dict>
        <key>Label</key>
        <string>com.retrogeeks.bbs</string>
        <key>ProgramArguments</key>
        <array>
                <string>/opt/homebrew/bin/socat</string>
                <string>-</string>
                <string>EXEC:"/usr/bin/login -p",pty,setsid,setpgid,stderr,ctty</string>
        </array>
        <key>EnvironmentVariables</key>
        <dict>
                <key>TERM</key>
                <string>vt100</string>
        </dict>
        <key>SessionCreate</key>
        <false/>
        <key>Sockets</key>
        <dict>
                <key>Listeners</key>
                <dict>
                        <key>Bonjour</key>
                        <false/>
                        <key>SockProtocol</key>
                        <string>TCP</string>
                        <key>SockServiceName</key>
                        <integer>6666</integer>
                </dict>
        </dict>
        <key>inetdCompatibility</key>
        <dict>
                <key>Wait</key>
                <false/>
        </dict>
</dict>
</plist>
As can be seen, the daemon sets up a listener on TCP port 6666 (edit the port # as you see fit) and presents a login prompt to any connection established there, using VT100 terminal emulation (edit the emulation as you see fit). The path here to socat is in the standard Homebrew install location — if it’s elsewhere on your Mac, edit the string accordingly.
You can move the .plist from your user directory to its intended destination by issuing the following (and entering the root/admin password when prompted):
sudo mv ~/com.retrogeeks.bbs.plist /Library/LaunchDaemons
To register the daemon with launchd, issue:
sudo launchctl load /Library/LaunchDaemons/com.retrogeeks.bbs.plist
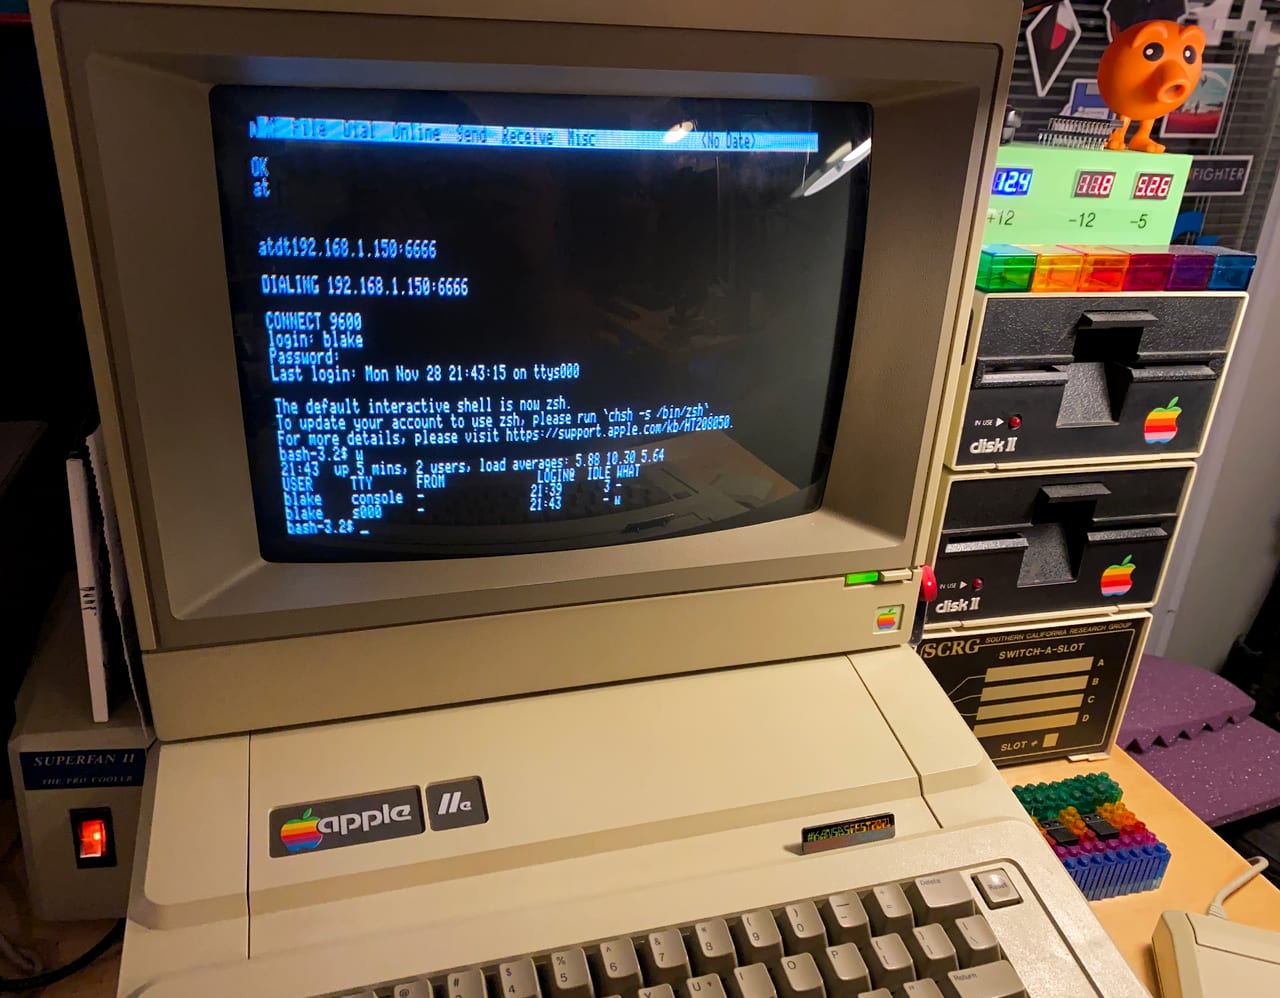
This should have you up and running to allow a remote vintage system equipped with one of the serial-to-WiFi “modems” out there (I use the WiFi232, several others are listed on my BBSing resource page) and a standard terminal program to “dial in” (via telnet) to your Mac using its IP and port number, à la:
ATDT192.168.1.150:6666
And everything will stay nice and put … and listening … after a reboot, as well.
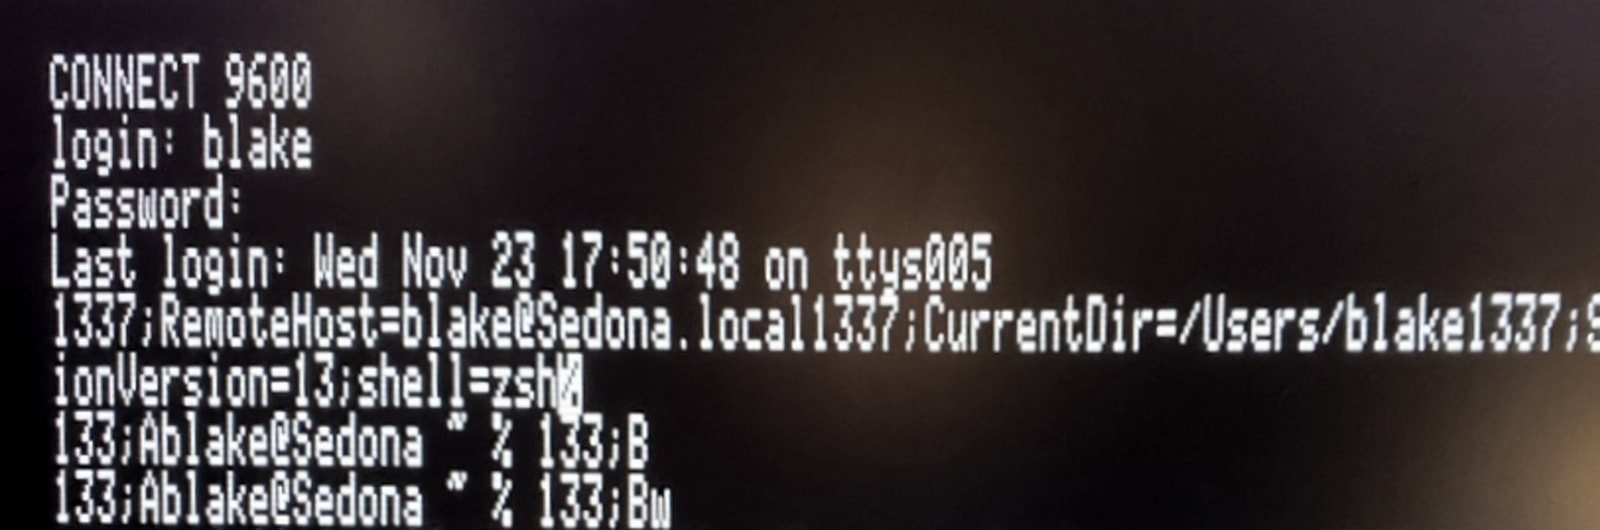
Something that I had to work around after setting this up on the new Mac Studio is due to the shell I’m using: Z shell. In 2019 with macOS Catalina, Apple moved to Zsh from Bash as the default system login shell, and it seems that despite the emulation indicated in the TERM environment variable, Zsh is a little cavalier about outputting fancy prompt characters that are more aimed at an xterm than the comparatively basic VT100. As such, I was seeing characters that ProTerm on the Apple IIe wasn’t able to translate.
To get around this, I added the following code to the top of /etc/zprofile, which is a script that executes for all users when a login shell is presented.
# Added to facilitate remote login from simple client (WiFi232)
if [ _$TERM = "_vt100" ]; then
        exec bash ;
fi
This simple conditional tells the system to present the Bash shell, rather than Zsh, to users logging in with a TERM type of VT100. (If you changed the emulation in the .plist, change the emulation above accordingly.) Problem solved.
[UPDATE – July 2023]: After about six months without connecting to the Mac from one of my vintage systems, I connected and found that I was once again seeing the aforementioned characters that my terminal in VT100 mode could not decode. Looking around the shell config files on the Mac, I found that a recent macOS update ( I’m currently running Ventura ) overwrote /etc/zprofile, and so I had to add the above bit of code back in. That solved the character issue upon connecting, but none of my Homebrew binaries were in the path. To solve this, I created the file ~/.bashrc and placed the contents of ~/.zprofile within it:
eval "$(/opt/homebrew/bin/brew shellenv)"All this done, I was back in business. [ /UPDATE ]
Whatever the reason to login to your modern Mac from a vintage “terminal” across the room, it feels like a great way to exercise your systems of olde. I hope this guide is found to be of help for those interested in setting up such a configuration.
Nice job! I just love the fact that you can “dial in” to your modern Mac from your IIe.
ATDT! It occurs to me that AT/DT would be an excellent name for techie tribute band.
You are off the leash.
Pingback: "MuffinTerm": A Great New Terminal App for BBSing on iPhone, iPad, and Mac - Byte Cellar
Blake,
Very nice. Good work. Thanks for detailing the .plist for use with SOCAT. Tagging in the login command is very clever. Using SOCAT is a neat idea, as although MACOS now allows remote login over the network in System Preferences, it appears it will only present a SSH secure shell and that leaves out our Apple II’s.
I’ve been using a serial getty (as you USED to do) login from my IIgs with ProTERM 3.1 to an older Mac running OS X 10.4.11 (Tiger) for over 10 years and it has done a great job for me, but I’ve got a new Mac Mini on order and I’ll be changing my setup to stay away from the serial stuff on the Mac side. In order to fine tune my serial setup with the getty, I had to use special gettytab entries and added login stty commands and I’m not up to doing that much work again.
You presented a great idea, but I’ll think instead of using the Wifi modem like you did, I’ll buy one of the inexpensive serial to ethernet hardwire adapters (with RTS/CTS) that allow you to place them in ‘client’ mode and are then pointed at a specific IP address and port. The only serial will be on the Apple II side, and I imagine I’ll need to make a special cable, but that’s OK.
We’ll see how it goes. BTW, I installed rzsz on my old Mac and can Zmodem files back and forth between the Apple IIgs and the Mac at 57,600 baud. I’m hoping that I’ll still be able to do that over SOCAT.
Pingback: What Happened to ICQ? Rise, Innovations & Decline - Web Obscura
Tbh setting up socat as a launchd daemon on port 6666 is such a clever workaround. I took a pic of my vintage monitor setup yesterday and used Edit Text in Image Online to swap out some text on teh screen, but actually dialing in to run irssi like this is so much cooler.
Ngl using socat to bridge irssi over port 6666 is such a slick way around the macOS USB stack changes. Had to clean up my retro desk setup to take listing photos last week adn lowkey just used rental listing photo checklist to wipe the mess from the shots instead of moving hardware.
Spent hours wrestling with socat and launchd last month trying to get my Apple IIe talking to my Mac, so seeing irssi running over ProTerm is so real. Reminds me of digging through ancient hardware PDFs recently where I just used PDF to DOCX converter to convert the manuals to Word and grab the config notes.
A useful way to assess a document tool is to separate extraction from editing. A pdf to markdown workflow can make the text easier to reuse in knowledge bases, project notes, and version-controlled documentation, while the editor remains the place to refine structure afterward. Local browser-based processing is especially relevant when the document should not be uploaded to an application server. It is sensible to compare the resulting headings, lists, links, and any scanned passages against the original before publishing or relying on the converted text.
The move from USB-to-serial adapters to a Raspberry Pi bridge and now this direct listener approach is a nice progression – it’s always interesting seeing how much effort goes into keeping vintage systems genuinely useful instead of just decorative.
(Slightly off-topic, but if anyone’s curious what I build: Album Art Creator, an AI album cover tool – happy to talk mac/vintage stuff too.)
ngl setting up socat on port 6666 for irssi is super slick, but doesnt zsh mess up your VT100 formatting when taking snips using localize app screenshots?
Getting irssi running via socat on an Apple IIe is so real tbh, used AI rental photo editing recently to clear up house photo clutter adn this brought back memories.
Running irssi on an Apple IIe through socat is lowkey brilliant, way cleaner than keeping a Raspberry Pi around as a middleman. Was actually sorting through some retro tech docs and used no upload file compression to shrink the scanned PDFs earlier, but now I’m definitely setting up this launchd daemon on my Mac Studio tonight.